Please note that the only procedures supported and maintained by Centreon are those published in the official documentation. If you have a question about this article, post it in the comments.
In this article, we will describe how to configure AzureAD with Centreon.
AzureAD is one of the most common Identity Provider nowadays, and through OpenID Connect, you are able to connect to Centreon from your AD.
We will present you a little step by step tutorial to create an AzureAD application, configure it, and configure your Centreon OpenID Connect Authentication.
Configure your application in Azure AD
First of all go to your Azure portal. You should see a banner with a list of Azure application:
- Click on Azure Active Directory.

- On your main dashboard click on Enterprise applications
- Then click on New Application. Provide all the informations to create your application.

For the purpose of this tutorial I have create a new application named "centreon-delegated-authentication"
On the main dashboard of your application, you will need 2 informations mandatory to configure AzureAD in Centreon.
1: Your Tenant ID
2: Your Client ID
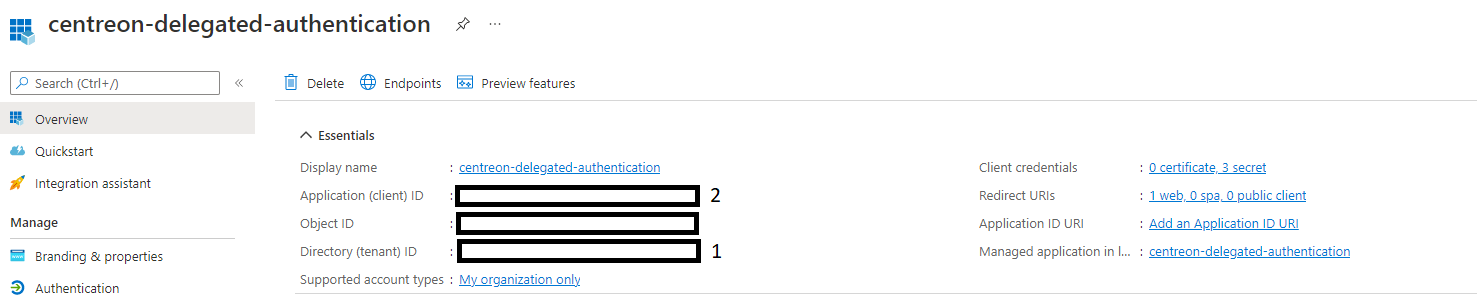
We will see later when and how to use those IDs.
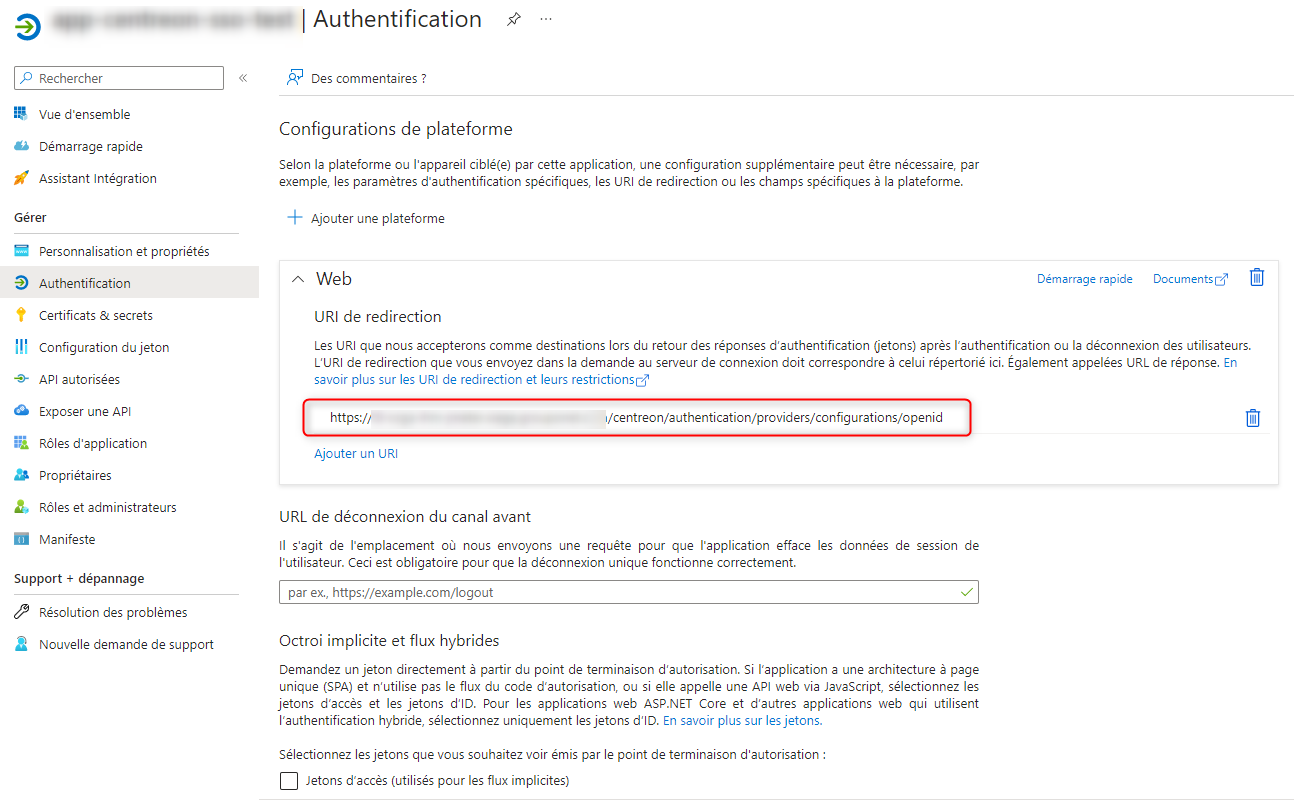
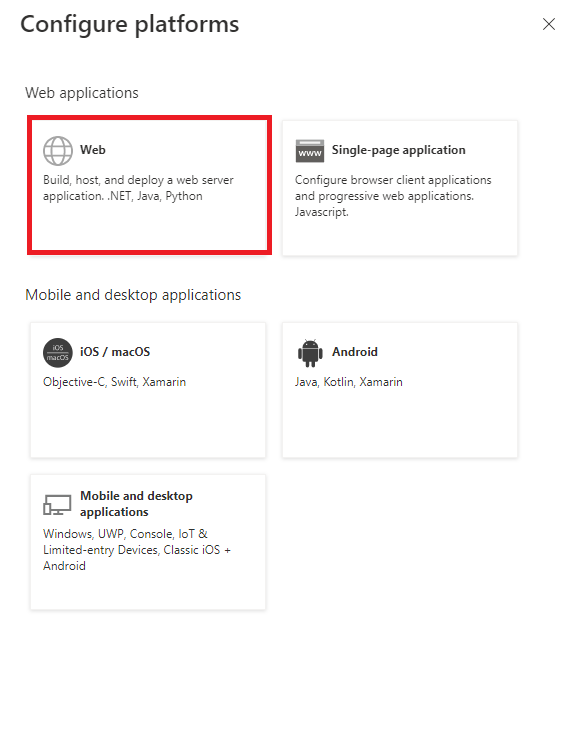
- Click on Authentication on the left menu.
- Click on the Add a Platform Button
- Click on Web
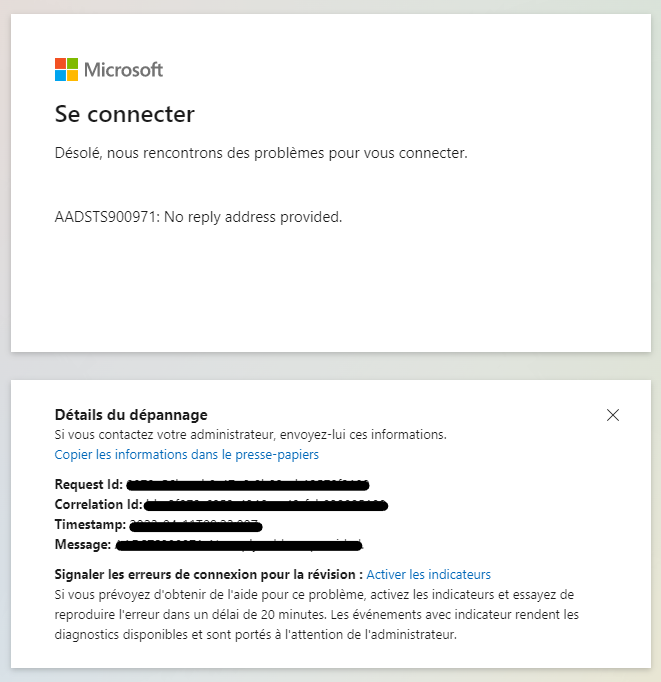
- To configure your Authentication you will need to provide a redirect uri.
The format should be <scheme>://<your_domain_name>/centreon/authentication/providers/configurations/openid
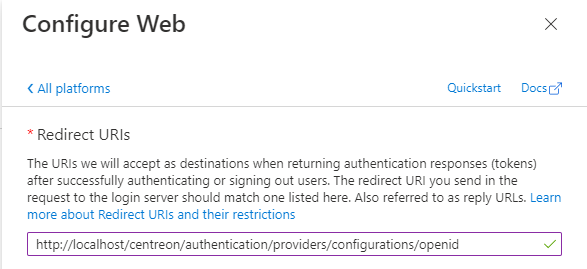
⚠️ If your Centreon platform is NOT on a localhost the scheme MUST BE https.
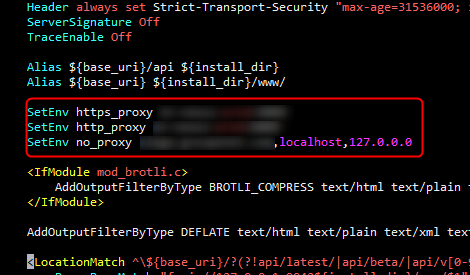
If your Centreon platform is not in HTTPS be sure to follow the documentation before going further in this tutorial
https://docs.centreon.com/docs/administration/secure-platform/#enable-https-on-the-web-server
- On the menu "Implicit grant and hybrid flows" be sure to only chose ID Tokens.
Now our application is configured. We still need to create a secret key to be able to configure it in Centreon.
- Click on Certificates & Secrets > Client secrets > New client secret
- Be sure to copy the value (3) of your secret key as it will only available on creation. After, you'll not be able to see this value anymore.

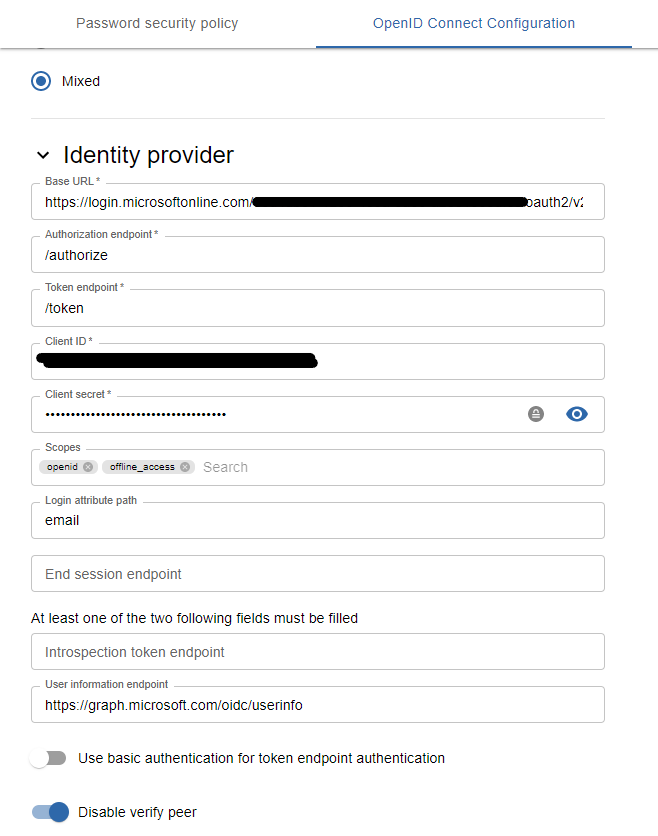
Now login to Centreon and access to the new Menu Authentication > OPENID CONNECT CONFIGURATION.
Configure it as follow:
- Enable OpenID Connect authentication
- Authentication mode: as you wish
- Base URL : https://login.microsoftonline.com/<your_tenant_id>/oauth2/v2.0
- Authorization Endpoint: /authorize
- Token Endpoint: /token
- Client ID: <your_client_id>
- Client Secret: <your_client_secret>
- Scopes: openid offline_access (offline_access is not mandatory but highly recommended as this scopes will provide refresh token)
- login claim value: email
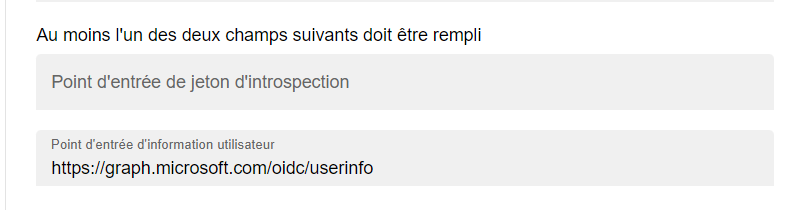
- User information endpoint: https://graph.microsoft.com/oidc/userinfo
Your configuration should look like this:
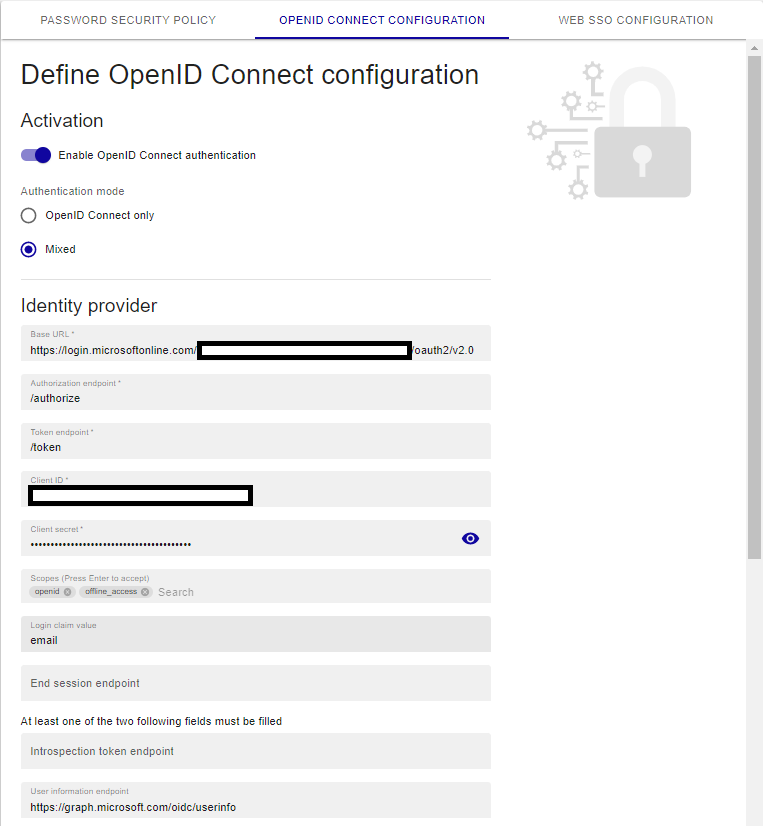
When you are sure all the informations are good, Save the form.
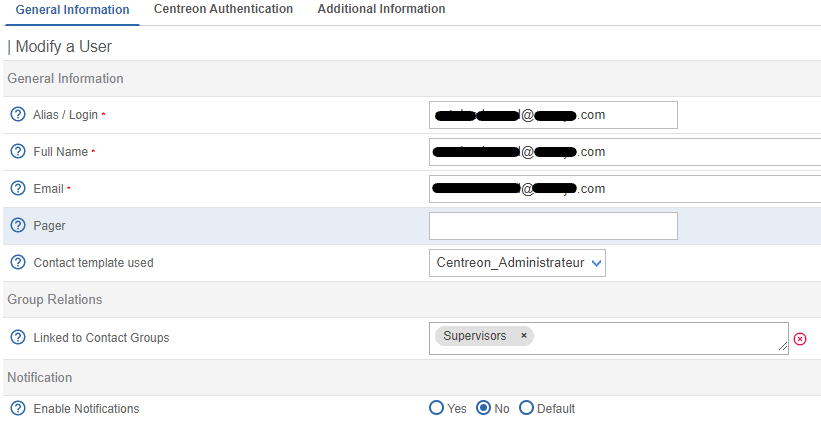
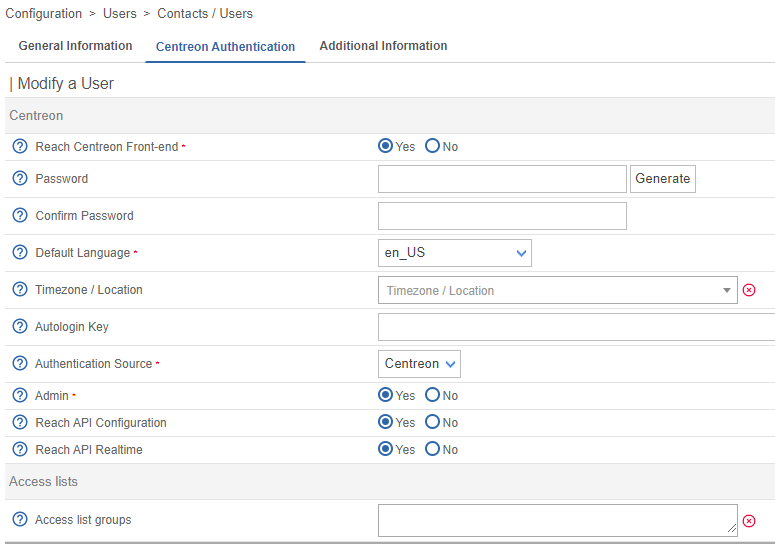
Centreon doesn't handle yet the auto import of user from AzureAD. You will need to create your users in Centreon before being able to connect.
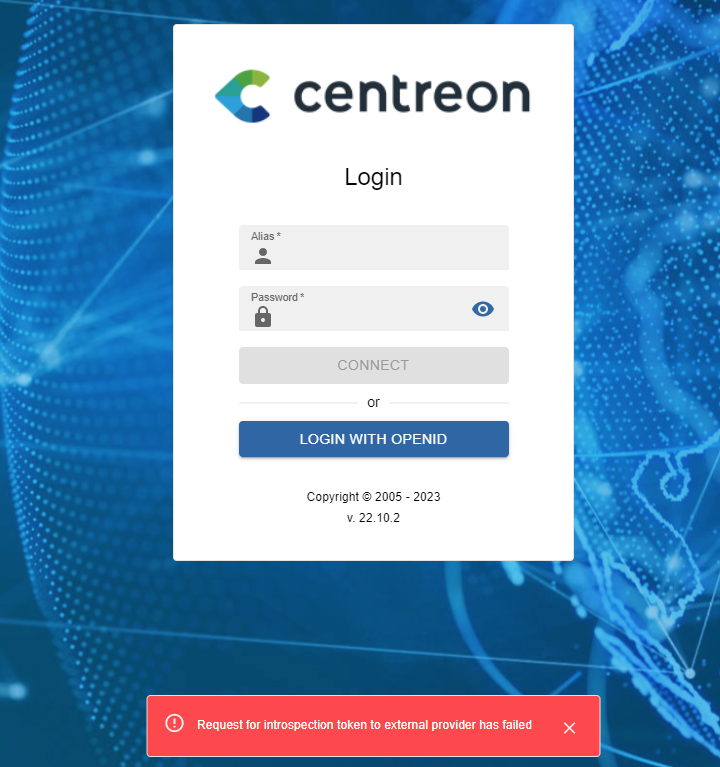
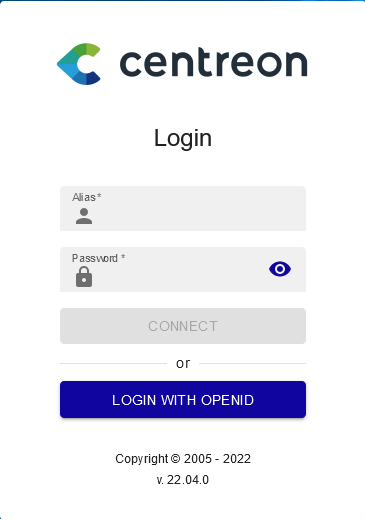
Once your users are created when reaching the Login page you will see a new button Login with OpenID.
While clicking on it you'll be redirect to your Azure AD Authentication. If your authentication is successful and your user is create in Centreon, you will be logged in Centreon!
Congratulations \o/ !