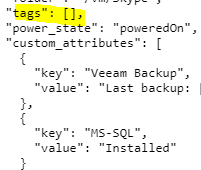
A few months ago, we added the capability to use VMWare Custom Attributes metadata as attributes when discovering ESX and Virtual Machines using the VMWare daemon and plugins.
These Custom Attributes generally help vCenter administrators to logically group and organize their resources within the vCenter. One specific thing about these attributes is that they are user-defined, which means that every user can set their own key/value pairs.
As an admin, you need complete control over a resource metadata value so that it can be a piece of reliable information to organize your CMDB, manage permissions, or provision your monitoring efficiently!
New metadata available within your discovery rules
Based on your feedback, we decided to make available new metadata commonly defined at your ESX/vCenter level: Tags indeed! The goal behind it is to align Centreon capabilities with those of the standard automation tools like Ansible and make your life easier by adding some magic to your operations:
-
Provision your VMWare resources using your favorite automation tools, tag your resources with any key/value that is relevant to your use case
-
Discover these resources thanks to Host Discovery
-
Leverage associated metadata to organize your monitoring (groups, categories) or apply different templates (apply OS or Application template to each resource associated with a given tag).
You can read more about Tags and Custom Attributes on the VMWare blog.
Let’s see how it appears in the VMWare UI from a user perspective (it may differ depending on your version). We will focus on the centreon-central-vm.
Those tags will help apply a template, filter out some results, or assign a specific dimension.
Categories aren’t managed (yet), but we would love to hear from you in the comment section if you have such a need.
How to set it up
| You must have a Centreon version > 21.04 and Centreon VMWare daemon > 3.2.5 to use this feature. |
To benefit from tags management, you will have to perform several actions. It will not take you more than five minutes!
Update your VMWare daemon, and restart it
On poller(s) executing the centreon-vmware daemon, update the package:
RPM Distributions:
yum update centreon-plugin-Virtualization-VMWare-daemon
Debian 11:
apt upgrade centreon-plugin-virtualization-vmware-daemon
Restart the daemon:
systemctl restart centreon_vmware
Update your Monitoring Pack(s)
Upgrade your VMWare Monitoring Packs on your central server, providing Host discovery rules.
If you are using an offline license, upgrade packages first:
RPM Distributions:
yum update centreon-pack-virtualization-vmware2-vm centreon-pack-virtualization-vmware2-esx
Debian 11
apt upgrade centreon-pack-virtualization-vmware2-vm centreon-pack-virtualization-vmware2-esx
> If you want to monitor VMWare resource for the first time, substitute update/upgrade by install in the commands above.
Go to the ‘Configuration > Plugin Packs” menu and click on the VMWare ESX and VMWare VM Packs to install.
Create or update your Host Discovery job definition
Go to “Configuration > Hosts > Discovery”.
If you create a discovery job for the first time, check out this documentation before going further.
If you update an existing one, just click on your current job definition and add --tags within the ‘Extra Options’ field:
Note that we increased the timeout to 30 seconds as the API for tags differs from the one used for monitoring, and calling it for each of the discovered assets introduces some extra processing.
Leverage Tags to filter the discovery result
Once your job successfully runs, you should see the result of the discovery on the right. Here I discovered 136 virtual machines:
To leverage tags on my ‘centreon-central-vm,’ we can use three kinds of mappers:
-
Exclusion, to exclude all VM with a tag with monitoring as a tag description and for which the tag name doesn’t match enabled.
-
Template, to apply the OS-Linux-SNMP-custom template to VM having OS as a tag description and linux as a tag name.
-
Host group, to create/assign the prod host group to every VM having the tag name prod:
The final result before hitting save will be similar to:
From 136 results, I was able to filter on the very specific VM interesting me:
Enjoy! As usual, share your feedback in the comments to help us continuously improve this feature.


